Woodworking Projects Without Power Tools: 7 Builds, Ranked
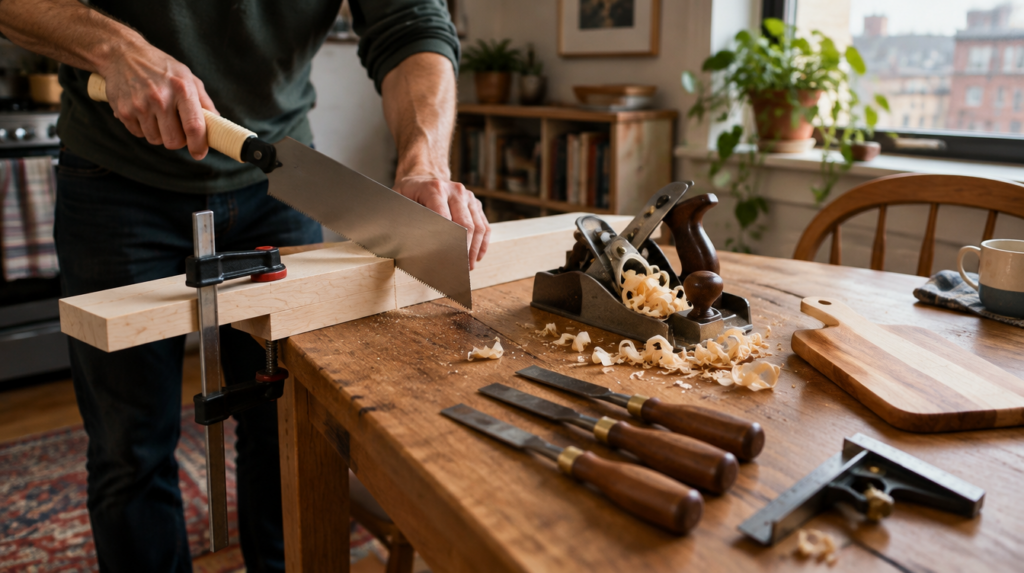
A circular saw cutting one-inch oak measured 96 to 107 decibels in a NIOSH Buy Quiet comparison, well above the 85 dBA level where the agency starts worrying about hearing. A Japanese pull saw going through the same board sounds like someone slowly tearing a paper bag. That difference is the whole case for woodworking projects without power tools: you can build real things at a kitchen table, in an apartment, after the kids are asleep, with no garage and no 15-amp breaker to trip.
The short answer to what you can build: a lot more than birdhouses. A cutting board, a wall shelf, a cedar planter, a coat rack, a lidded box and a step stool are all realistic with a saw, a plane, a few chisels, clamps and glue. We ranked seven of them below, from a Saturday afternoon build to something you will use for twenty years, and we priced the kit you need to make every one.
Disclosure: Let’s Check It Now may earn a commission or have a business relationship with brands mentioned in this article. This never changes what we recommend.
The hard part is not the cutting
Most beginner lists skip the step that actually stops hand-tool beginners. Before a single joint, a board has to be flat, straight and square. Woodworkers with a jointer and a planer do that in minutes. By hand, flattening a rough-sawn plank can eat an entire weekend and most of your enthusiasm.
So we would cheat, and we think you should too. Buy lumber that is already surfaced on four sides, labeled S4S at the store. The trade-off is price and selection, since a big-box 1×8 in poplar or maple costs more per board foot than rough stock from a sawmill. In exchange, you skip the milling and go straight to the part that is fun. Remember that lumber names are nominal. A 1×8 is really about 3/4 inch thick and 7 1/4 inches wide, so design around the real numbers, not the label.
The second cheat is for plywood. Many home centers will make a few straight cuts on a sheet of plywood at the panel saw if you ask, often free or for a small fee. Policies vary by store, so call ahead. A full 4×8 sheet cut down to shelf-sized pieces fits in a hatchback, and the long rip cuts are the ones a handsaw does worst.
A starter kit for about $200
You do not need the 12-piece chisel set or the antique plane collection you see on YouTube. Here is what covers all seven projects, with the rough price ranges you will find at hardware stores and online in the US.
- A Japanese ryoba or dozuki pull saw, $30 to $45. It cuts on the pull stroke, so the thin blade stays straight and the learning curve is short.
- A miter box with its own backsaw, $20 to $35, for square and 45-degree cuts without marking skill.
- Three bench chisels, 1/4, 1/2 and 3/4 inch, $30 to $60. Buy singles or a small set.
- A block plane, $30 to $60. It trims end grain, breaks sharp edges and fixes a joint that is a hair too tight.
- A combination square ($15), a tape measure and a marking knife or sharp pencil.
- Four clamps, F-style or bar clamps 12 to 24 inches, about $40 for the set.
- A hand drill or brace with bits, $25 to $40, or a cheap cordless drill if you allow yourself one exception.
- Wood glue (Titebond II or similar, about $6), sandpaper in 120, 180 and 220 grit, and a sharpening stone or sandpaper on glass.
The sharpening item matters more than it looks. OSHA’s Hand and Power Tools booklet says plainly that dull tools can cause more hazards than sharp ones, because you push harder and the tool slips. A chisel that slides through pine with hand pressure is safer than one you have to hit. The same booklet warns against using a chisel as a screwdriver, since the tip can snap and fly. Keep a cheap screwdriver nearby and the chisels for wood only.
Seven projects, ranked from first weekend to first piece of furniture
The order below is deliberate. Each build teaches one skill the next one needs, so by project seven you are cutting joints that hold a person’s weight.
| Project | Key tools | Lumber cost | Time | Skill it teaches |
|---|---|---|---|---|
| 1. Serving or cutting board | Saw, block plane, sandpaper | $15 to $30 (maple or cherry) | 3 to 4 hours | Square crosscuts, finishing |
| 2. Wall shelf on dowels | Saw, drill, square | $15 to $25 (pine 1×8) | One afternoon | Accurate drilling and layout |
| 3. Cedar planter box | Miter box, drill, clamps | $20 to $35 (cedar fence pickets) | One day | Butt joints, glue and screws |
| 4. Coat rack with pegs | Saw, drill, chisel | $15 to $30 (oak or poplar) | One day | Chamfers, gluing pegs straight |
| 5. Bookends | Saw, chisel, plane | $10 to $20 (hardwood offcuts) | One afternoon | Your first half-lap joint |
| 6. Lidded keepsake box | Miter box, plane, clamps | $20 to $40 | Two weekends | Miters, fitting a lid |
| 7. Step stool | Pull saw, chisels, clamps | $35 to $60 (poplar or pine) | Two to three weekends | Dados and through-wedged joints |
Start with a board, not a birdhouse
A birdhouse sounds easy, but it has angled roof cuts, small parts and a hole that needs a large bit. A serving board is one piece of wood. You cut it to length, plane the ends, round the corners, sand through three grits and wipe on food-safe mineral oil. Choose a closed-grain hardwood like maple, which holds up to knives and washing. It is the fastest way to learn whether your crosscuts come out square, and if one does not, you plane it until it does.
Shelf, planter and coat rack teach layout
Projects two through four are where measuring gets real. A shelf on two dowels only hangs level if both holes line up, so you learn to mark with a square and drill straight. A planter made from cedar fence pickets, which cost a few dollars each, is the cheapest box you will ever build and it forgives sloppy joints because nobody inspects the inside of a planter. The coat rack adds a chamfer along the edges with the block plane and five pegs that have to be glued in at the same angle.
Bookends and the box are your joinery school
Bookends are two L-shapes, and the right way to join each L is a half-lap: you saw and chisel away half the thickness of both parts so they overlap flush. It is the most useful joint a hand-tool beginner can learn, and a failed attempt costs you a $10 offcut. The lidded box then asks for four miters that close without gaps and a lid that fits. Expect your first box to show a gap or two. A thin sliver of matching wood glued into a gap and sanded flush hides most of it, and the second box is always tighter.
The step stool is the graduation piece
A stool that holds an adult is honest proof that your joints work. The classic hand-tool version uses dados, which are flat-bottomed grooves the legs sit in, plus a stretcher wedged through the legs. No metal hardware is needed if the joints are tight, though there is no shame in adding screws underneath. Use poplar or clear pine, and build it at the end, not the start.
Where hand tools beat a garage full of machines
Noise is the obvious win. The less obvious one is dust. The CDC’s workplace safety institute notes that random orbital sanders create significant amounts of wood dust, and that workers exposed to it have shown eye and skin irritation, allergy, asthma, reduced lung function and nasal cancer. A hand plane makes shavings, not fine airborne powder, and hand sanding a small project throws off far less than a power sander running for an hour. You still want a mask for heavy sanding and good airflow, but a hand-tool shop is a much easier room to share with family.
There is a cost case too. The kit above runs about $200. Even budget versions of a circular saw, an orbital sander, a jigsaw and a router add up to $300 to $500 before you buy a single extra blade. And because hand tools are slower, you make fewer expensive mistakes, since you usually notice the line drifting before the cut is finished.
What we would not pretend: hand tools are slower for big jobs. If your plan is a dining table or a run of kitchen cabinets, you will spend weeks on cuts a table saw makes in an afternoon. Hand tools suit small to medium furniture, gifts and anything you want to make quietly and well.
Which joints should you learn first?
Three joints cover almost every project in this list. The butt joint is two boards meeting flat, held by glue and screws or nails. It is weak on glue alone across end grain, so always add fasteners. The half-lap is the next step and is surprisingly strong because of the large glue surface. The dado, a groove that one board slides into, is what makes shelves and stools sturdy.
Skip dovetails for now. They look like the badge of a real woodworker, and you will get there, but a beginner who spends a month on dovetails often quits before building anything useful. Get ten half-laps behind you first.
When paid plans are worth it
Every project above can be built from a sketch on graph paper. Where printed plans help is the bigger stuff, such as a bench, a potting table or a shed, where a cut list saves real money on lumber. If you want a large plan library, Ted’s Woodworking sells one as a digital download. Be aware that many of its plans assume you own power tools, so you would adapt the cuts. We went through what the package actually includes in our look at whether Ted’s Woodworking is legit. If you only plan to build the seven projects here, free plans and your own sketches are enough, and we would skip it.
If you are still deciding whether this hobby is for you at all, our piece on why woodworking is the calm, useful hobby people are rediscovering covers what keeps people at it past the first month.
Your next step is small. This weekend, buy one 3-foot length of 1×6 maple and a pull saw, cut it into a 16-inch serving board, and plane both ends until a square sits flat against them. If that cut comes out square, you are ready for the shelf.
Woodworking without power tools: frequently asked questions
A serving or cutting board from a single piece of surfaced maple. It needs one or two crosscuts, a block plane, sandpaper and mineral oil, and most beginners finish it in three to four hours.
A pull saw, a miter box, three chisels (1/4, 1/2 and 3/4 inch), a block plane, a combination square, four clamps, a hand drill, glue, sandpaper and a way to sharpen. Expect to spend around $200 in total.
Yes. Stools, benches, shelves, boxes and small tables were built by hand for centuries. Large pieces like dining tables take much longer by hand, so most people start with small furniture.
Surfaced poplar and clear pine are cheap and cut easily. Maple is better for cutting boards. Avoid rough-sawn lumber at first because flattening it by hand is slow and frustrating.
It removes the risk of kickback and is much quieter, but sharp edges still cut. OSHA notes that dull tools cause more hazards than sharp ones, so keep chisels sharp, clamp your work and cut away from your body.